Payments
Google Pay
In a nutshell
Turn on Google Pay, accept it on Checkout, and add the Google Pay button to your own website.
Google Pay lets customers pay with a card saved to their Google account. It works in most desktop browsers (Chrome, Microsoft Edge, Brave, Safari and Firefox) and in Chromium browsers on Android. In Android apps, use the Android SDK.
Google Pay compliance
By turning on Google Pay, you agree that all transactions you process through Paystack comply with the Google Pay and Wallet API Acceptable Use Policy and the Google Pay API Terms of Service. If you show Google Pay branding on your own pages, use only approved assets that follow the Google Pay web brand guidelines.
Copy linkHow Google Pay authorizes a payment
Paystack accepts two Google Pay authorization methods, both on by default:
CRYPTOGRAM_3DS: the card is tokenized on the device and the customer authenticates with their fingerprint or face. Card networks treat this as equivalent to 3DS, so Paystack doesn't run a separate 3DS challenge.PAN_ONLY: the card is a stored card number with no device authentication behind it. Paystack runs a 3DS step-up on every one of these charges.
Cards issued in South Africa can use both methods. When the Google Pay sheet loads, Paystack prefers CRYPTOGRAM_3DS on Android and Chromium, and falls back to PAN_ONLY everywhere else. Paystack also sets the supported card networks for you: Visa and Mastercard.
Before you go live, review Google's integration checklist. For Google's full technical reference, see the Google Pay web developer documentation.
Copy linkTurn on Google Pay
On the Paystack Dashboard, open the Developers page, select the Google Pay tab and turn on Google Pay.
Card channel required
Keep Card turned on alongside Google Pay. Google Pay runs on the card channel.
If you use Invoices, Payment Pages, Storefronts or a plugin that sends customers to Paystack to pay, Google Pay is available there as soon as you turn it on.
Copy linkAccept Google Pay on Checkout
Google Pay needs version 2 of InlineJS. Call checkout() from your payment button. You don't need any extra HTML:
const popup = new Paystack()

async function payWithPaystack() {
  await popup.checkout({
    key: 'pk_domain_xxxxx',
    email: '[email protected]',
    amount: 10000,
    currency: 'ZAR',
    onSuccess: (transaction) => {
      console.log('Transaction: ', transaction)
    },
    onCancel: () => {
      console.log('Popup closed')
    }
  })
}
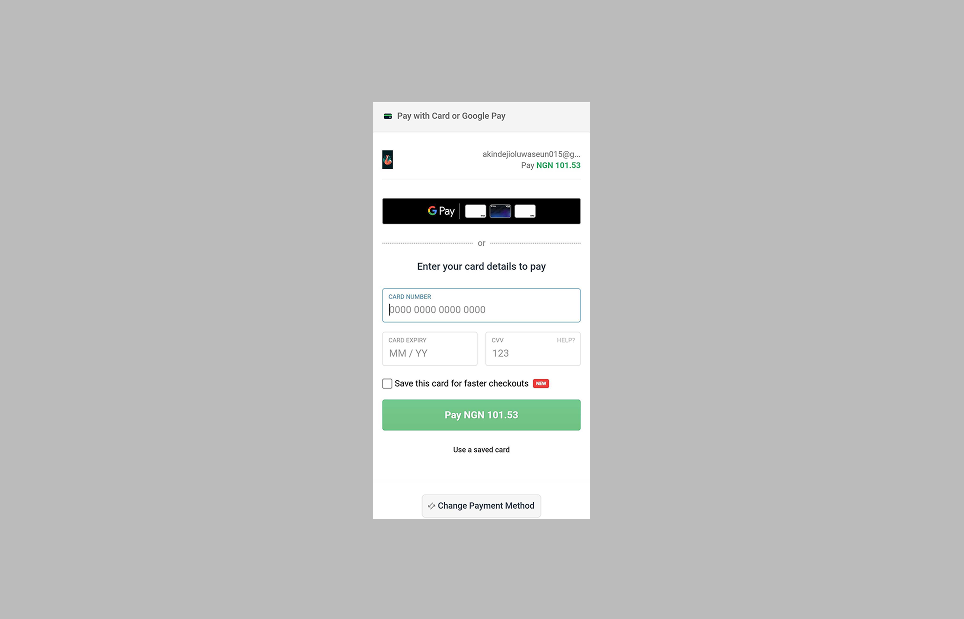
If the customer's browser supports Google Pay, Checkout shows the Google Pay button in the card section:
Copy linkAdd the Google Pay button to your website
The payment request button puts Google Pay on your own page, styled to match it. Apple Pay mounts into the same container, so each customer sees the wallet their device supports.
The payment request button needs @paystack/inline-js version 2.26.0 or later. If you load InlineJS from the CDN, you already have it. If you installed it with npm, yarn or pnpm, upgrade first.
Copy linkSet up your Google Pay merchant profile
Google checks the website showing the button against a registered merchant profile. Checkout runs on Paystack's profile, but a button on your own website needs yours.
Follow Google's guides to create and publish your integration:
- Set up your Google Pay integration: create a Google Pay & Wallet Console account and configure your integration. Choose a
WEBintegration with theGATEWAYtype. Add every website that shows the button as a web integration. - Publish your integration: move it from
TESTtoPRODUCTIONso it can process real payments.
Copy linkAdd your merchant details to the Dashboard
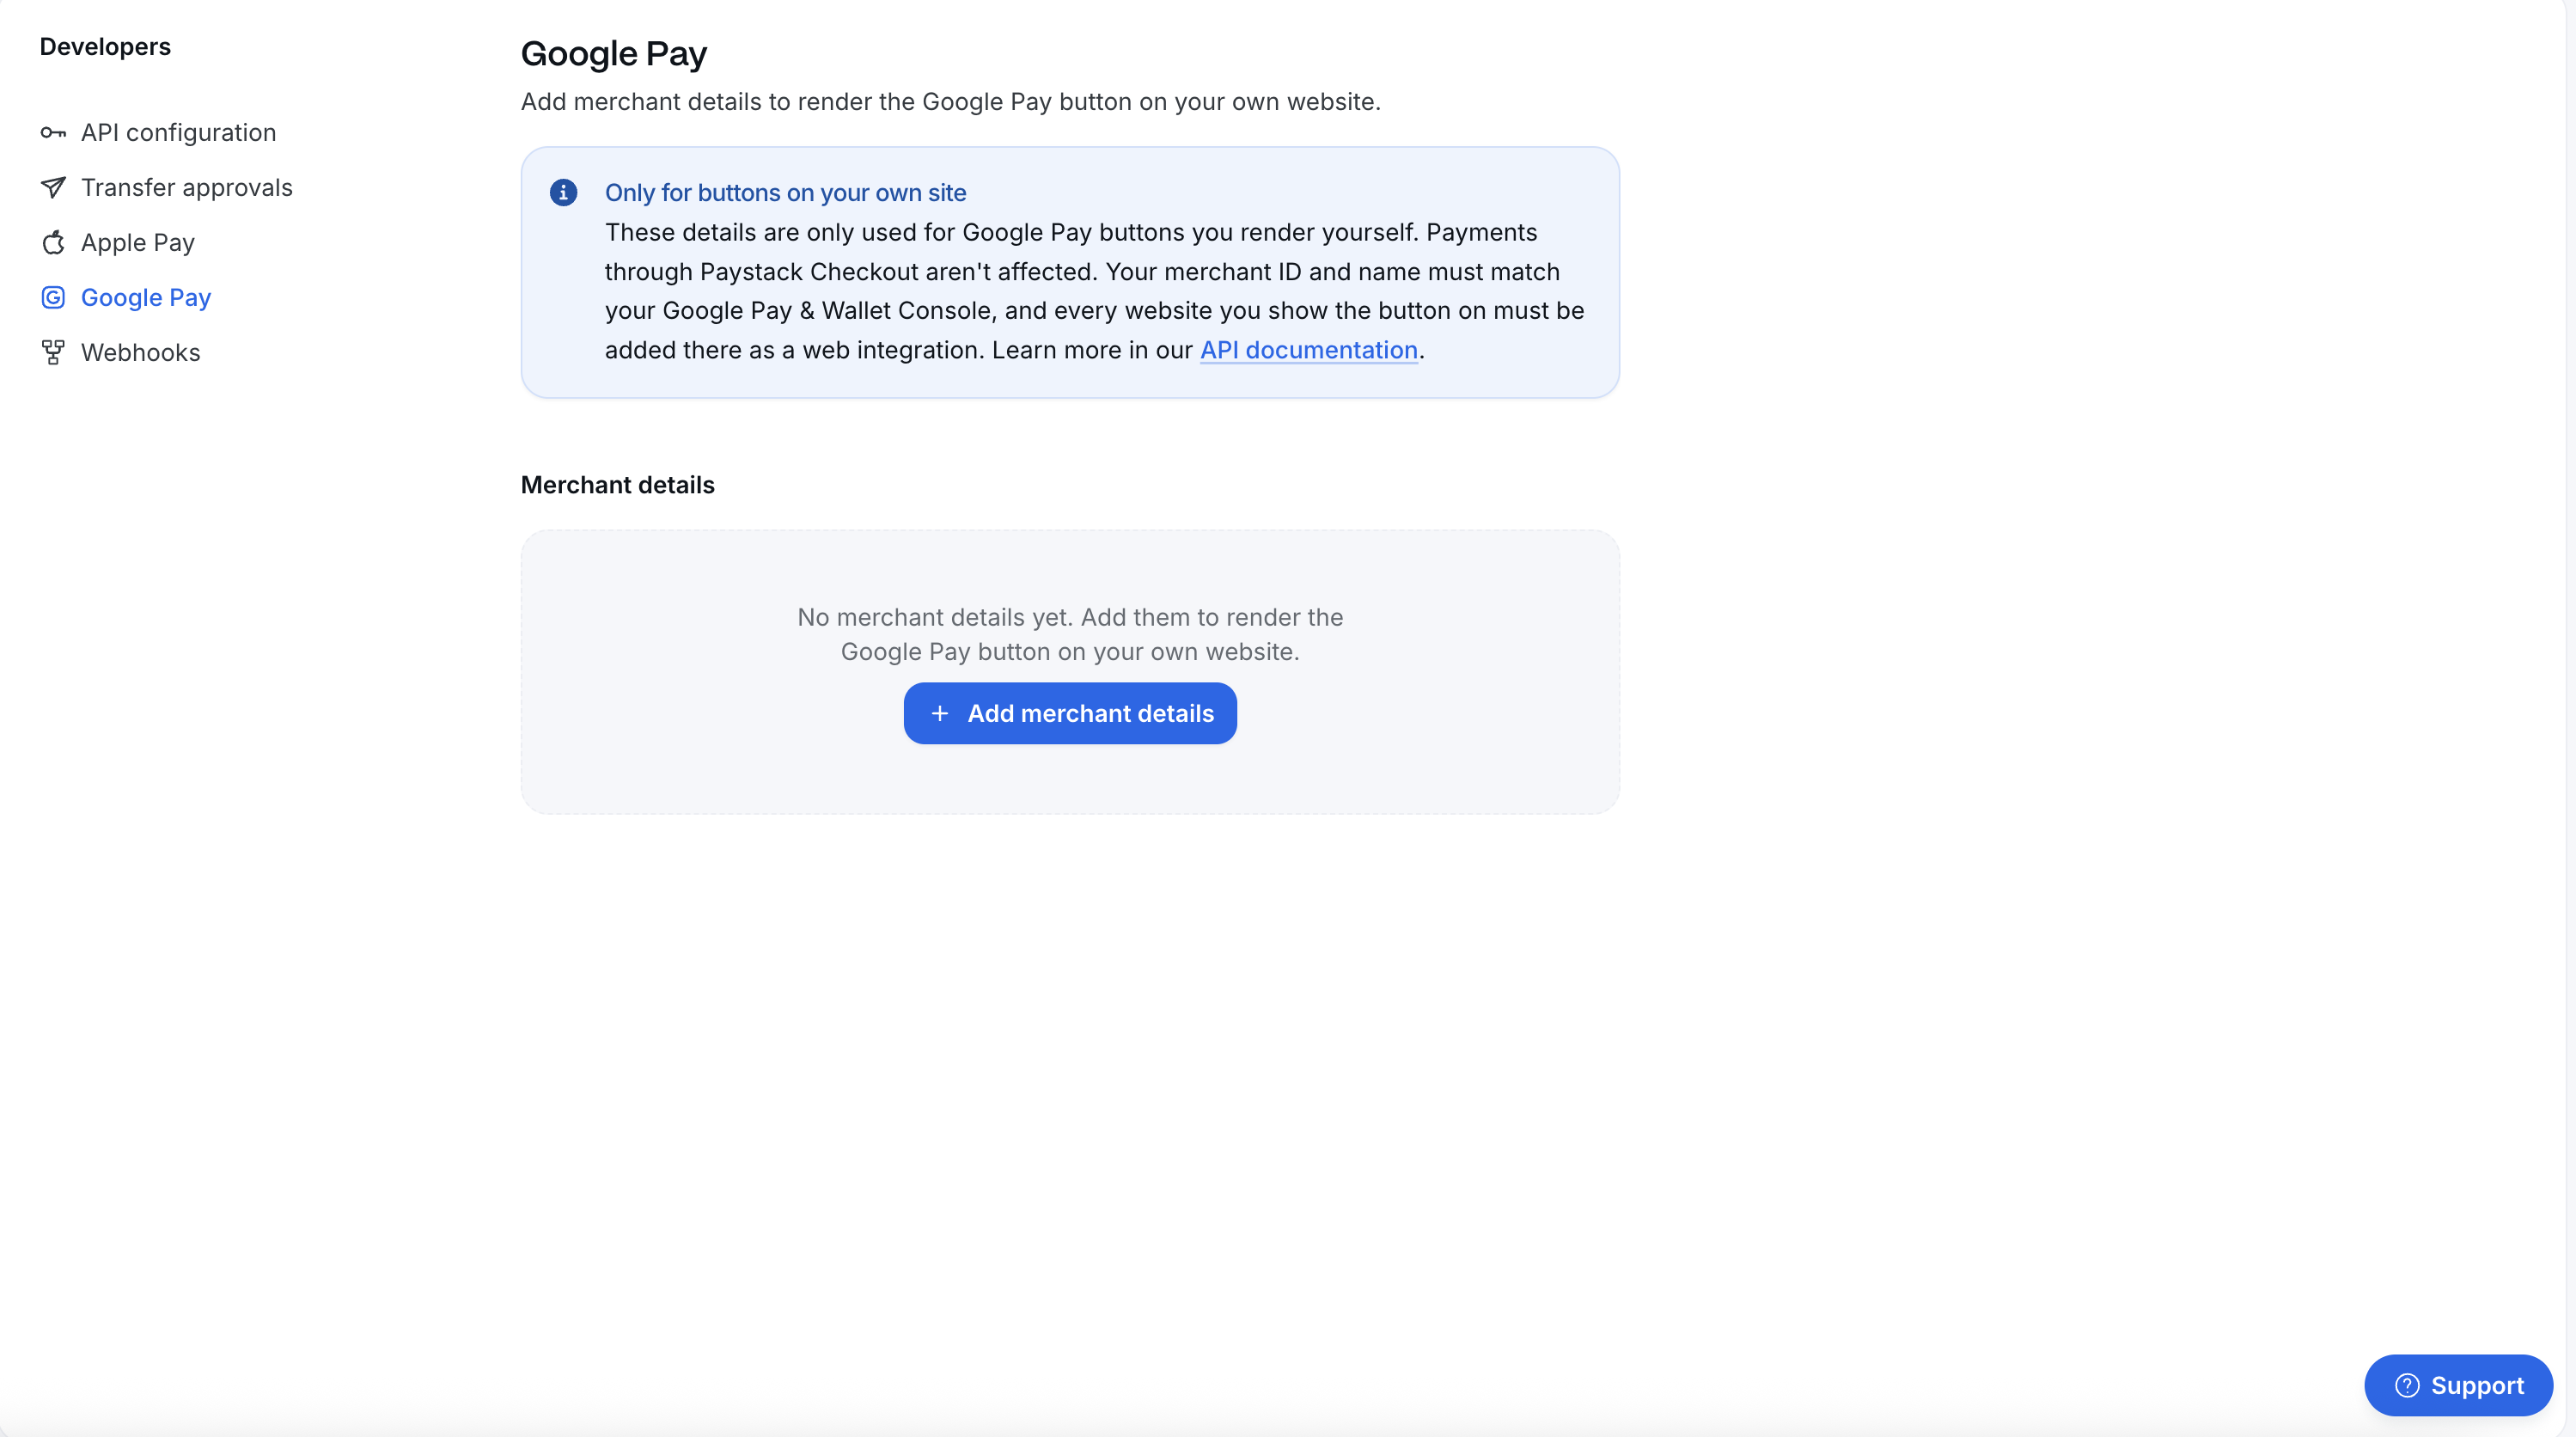
After Google approves your integration, open the Developers page, select the Google Pay tab and click Add merchant details.
Fill in the form with the values from your Google Pay & Wallet Console:
- Merchant ID: your production Google Pay merchant identifier, a 15 to 16 character string.
- Merchant name: the business name shown in the Google Pay & Wallet Console.
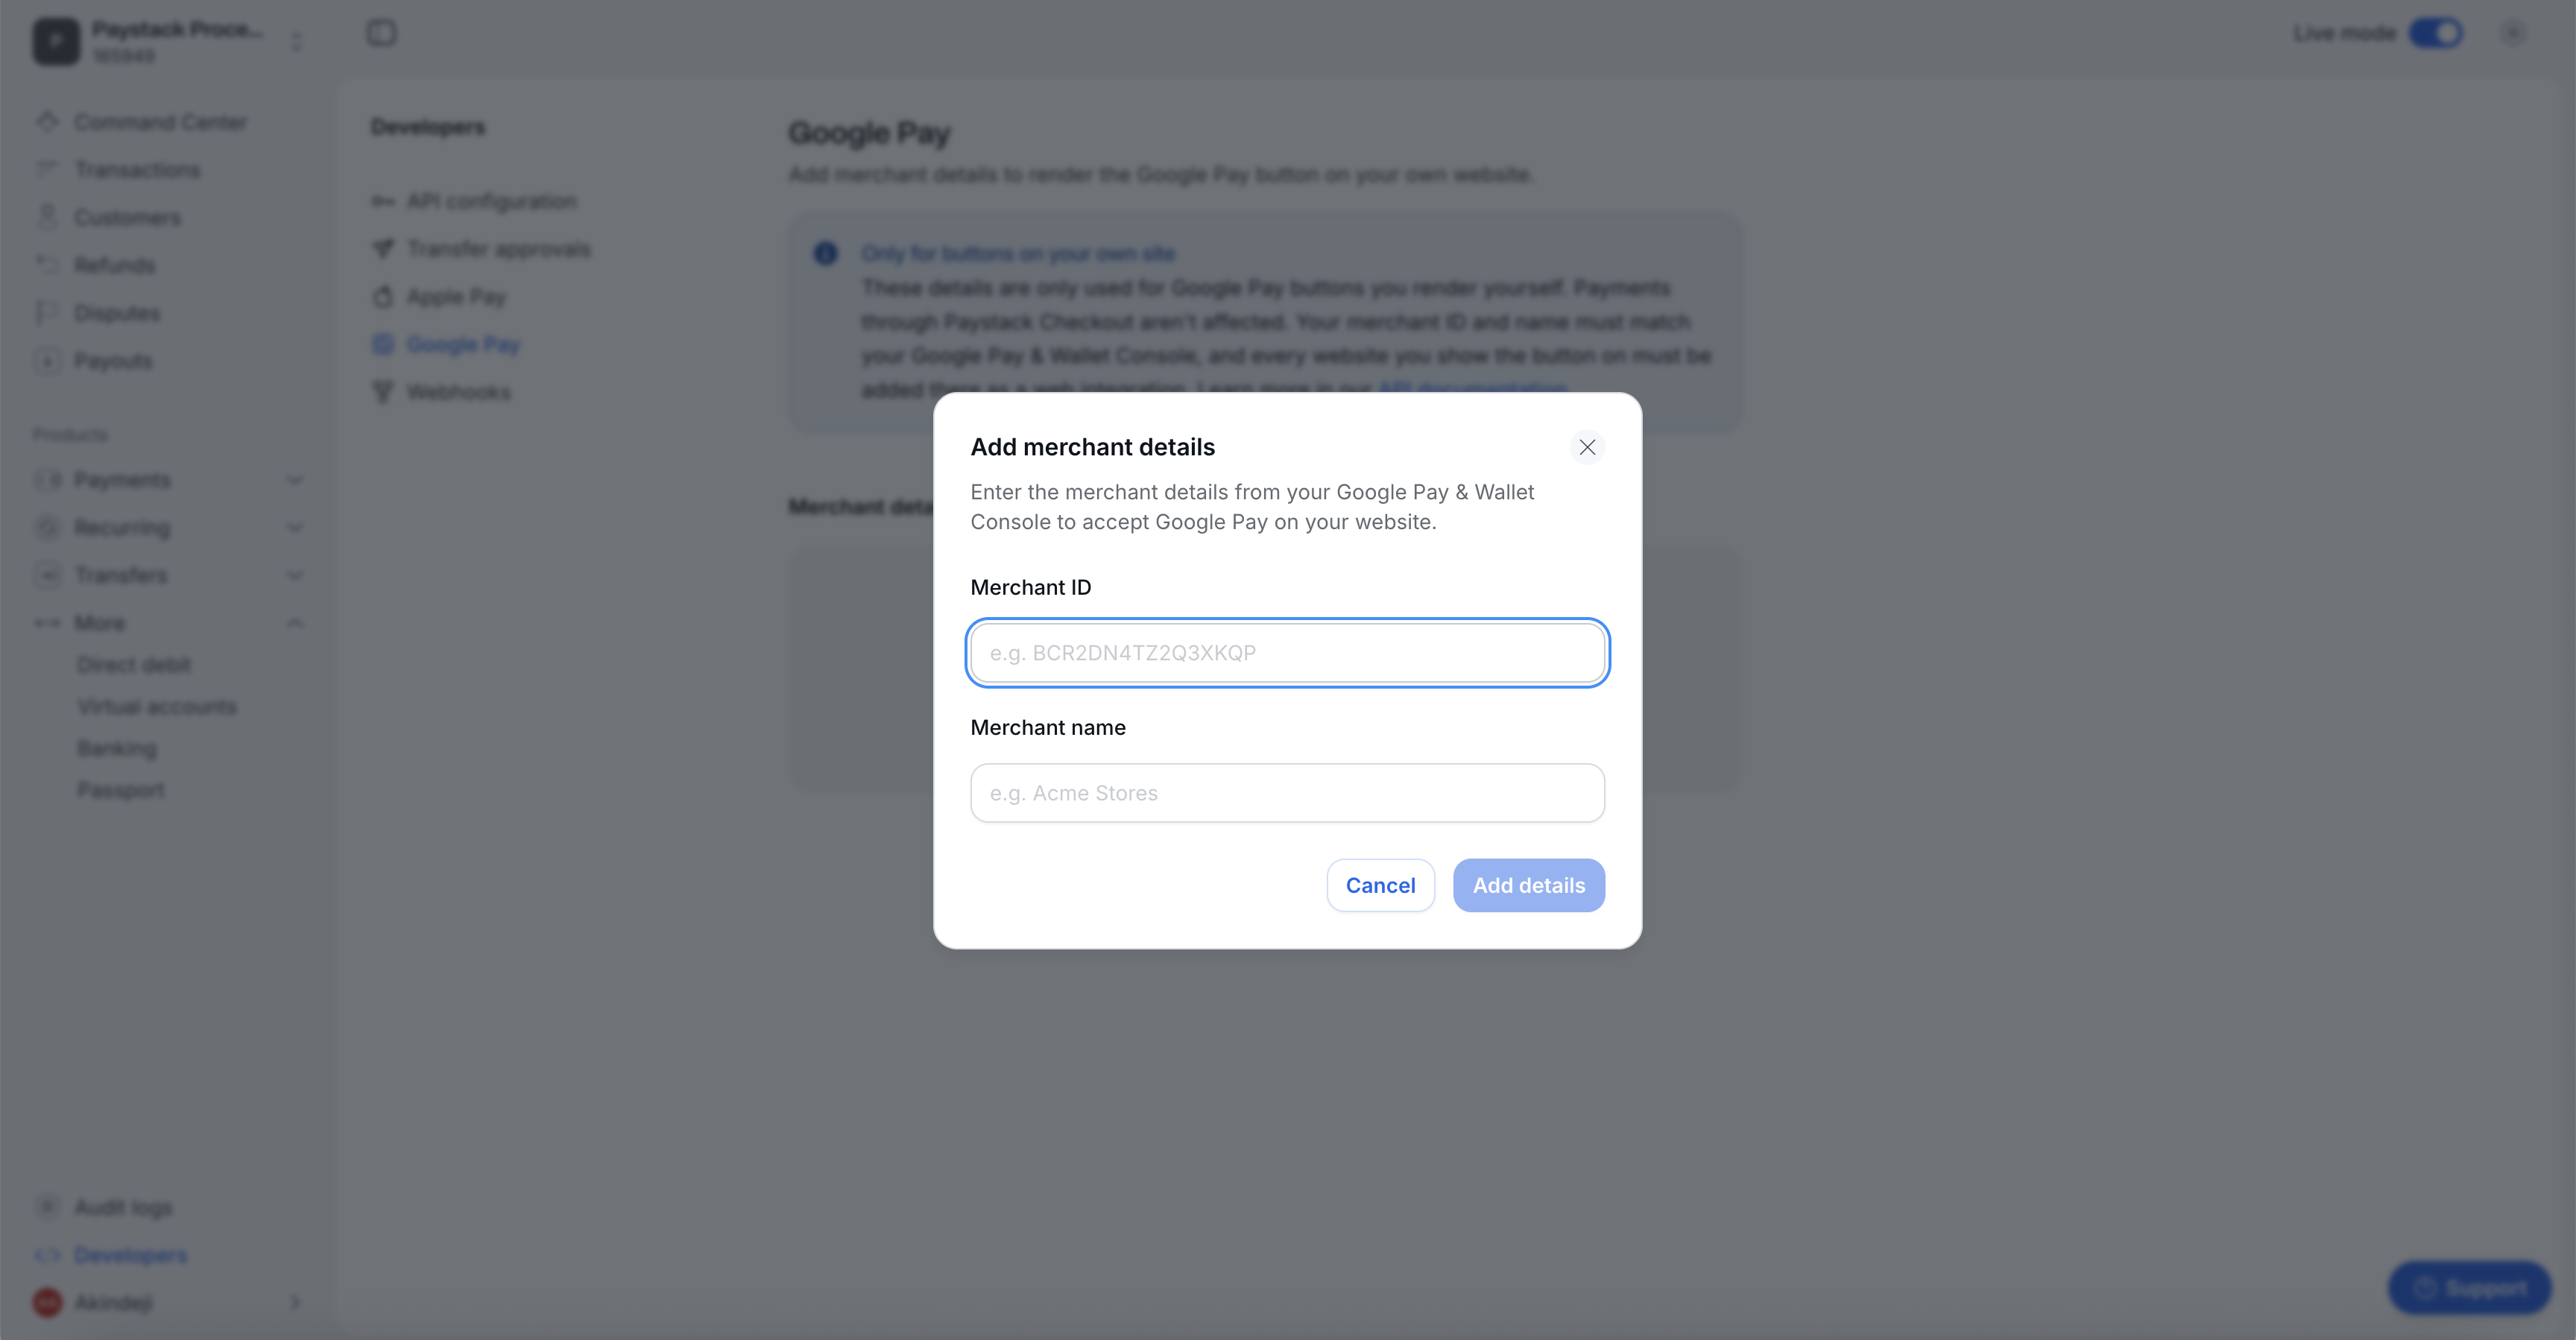
Paystack passes these details to Google Pay when it mounts the button, so you don't configure them in your code. They only apply to buttons on your own website, not to payments on Checkout.
Copy linkCreate a container
Add a div for the wallet buttons and, optionally, a button that opens Checkout for other payment channels:
<!-- Wallet buttons, styles and event listeners are injected into this div -->
<div id="paystack-wallet-buttons"></div>
<button id="paystack-other-channels">More payment options</button>
Give the div a unique id. You pass this id to paymentRequest().
Copy linkSet up the payment request
Pass the container id, and the id of the button that opens Checkout, to paymentRequest():
const popup = new Paystack()

await popup.paymentRequest({
  key: 'pk_domain_xxxxx', // Replace with your public key
  email: '[email protected]',
  amount: 10000,
  currency: 'ZAR',
  channels: ['card', 'google_pay'],
  container: 'paystack-wallet-buttons', // ID of the div that holds the wallet buttons
  loadPaystackCheckoutButton: 'paystack-other-channels', // ID of the button that opens Checkout (optional)
  styles: {
    theme: 'dark',
    googlePay: {
      height: '50px',
      borderRadius: '3px',
      buttonType: 'pay'
    }
  },
  onSuccess(transaction) {
    console.log('Transaction: ', transaction)
  },
  onError(error) {
    console.log('Error: ', error)
  },
  onCancel() {
    console.log('Payment cancelled')
  },
  onElementsMount(elements) { // { applePay: Boolean, googlePay: Boolean } or null
    if (elements && elements.googlePay) {
      document.querySelector('#paystack-other-channels').innerText = 'More payment options'
    }
  }
});
For every styling option, see paymentRequest(options) in the InlineJS reference.
Authorization method on your own website
The payment request button only offers CRYPTOGRAM_3DS. PAN_ONLY isn't available on your own website.
The button only appears when all of these are true:
- Your page is served over HTTPS.
channelsincludesgoogle_payandcard. If you passgoogle_paywithoutcard, the transaction doesn't initialize.- The customer's card is saved as an Android device token. In practice, this means an Android device with a card in Google Wallet.
Copy linkRecurring charges
After Paystack authorizes a Google Pay charge, you can charge the authorization again for subscriptions and recurring payments, the same way you charge a saved card. See Charge an authorization.
Copy linkRefunds
Google Pay refunds work the same way as card refunds, including partial refunds. See Refunds.
Copy linkTroubleshooting
If Google Pay isn't working, check that:
- Your site serves every page over HTTPS.
- Google Pay is turned on in the Google Pay tab of the Developers page.
- If you show the button on your own website, your merchant details are saved in the same tab.
If those check out, match the error you see:
| Error | Resolution |
|---|---|
| Merchant's Category not supported for Google Pay | Paystack only allows some business categories to use Google Pay. Email [email protected] to find out more. |
DEVELOPER_ERROR or MERCHANT_ACCOUNT_ERROR from Google Pay | Google rejected the merchant profile behind the button. Check that your integration is published in the Google Pay & Wallet Console, and that the website showing the button is added and approved there as a web integration. |
| An error occurred while processing request | Paystack couldn't decrypt the token, or the transaction hit an internal error. Retry the charge. If it keeps failing, contact Paystack Support with the transaction reference. |